Showing posts with label main. Show all posts

Wednesday, June 1, 2011

Memorial Day Trifecta: Food, friends, fun (and THREE recipes)


Memorial Day was fun. A lot of fun.

As promised, there was food... (A lot of food). There was wine, there was merriment.   

In fact, our Memorial Day barbeque marked one of the most enjoyable cooking adventures I've had in a while. 

Why you ask?

For one, the food was good. Okay, the food was freaking fantastic, but that's not the whole story.

I know what I'm about to say is really corny, but cooking with the famjam and sharing the whole experience with some of my closest friends is exactly why I enjoy doing this so much. Great food, even better company. It's a combination that just can't lose. 

Imagine the delight in being able to put a smile on someone's face using a simple, yet devilish combination of flour, sugar, and (coconut) butter.... Now that's what I call fun. 

The entertaining, the socializing, the noshing-- about as good as it can get. It was fabulous. 

These recipes seriously exceeded my expectations. I hope you all enjoy them as much as we did. In case there was any doubt, the damage we did on this summer holiday feast pretty much confirms it. Sadly, most of the photographs were taken after the carnage.

-----------------

Homemade BBQ Sauce on Seitan Sandwiches
Makes a lot of sauce, approximately 4-5 cups 


Barbeque Pit Masters, here I come. This was my first attempt at making my own barbeque sauce. I'm not going to lie, I was nervous (people can be pretty picky about what goes on their pork), but my BBQ obsessed sister raved that mine was to die for. Phew. Success.

[1] small onion
[1] tbsp olive oil
[2 1/2] tsp salt
fresh cracked pepper
[2] 6 oz cans tomato paste
[1 3/4] cups water
[1/4] cup light brown sugar, packed
[1/3] cup molasses
[1/3] cup apple cider vinegar
[1/2 to 1] tsp cayenne pepper (depending on desired level of spice)
[1] tsp garlic powder
[1] tsp smoked paprika
[1/4] cup Worcestershire made without anchovies 
[1/4] cup ketchup (cop out? Debatable)

[1] package seitan
[4] whole wheat hamburger buns

Heat a medium sauce pan to low/medium. Add the olive oil and sauté the onions with a teaspoon of salt and a few cracks of black pepper until translucent and soft. 

Mix in the tomato paste and allow to cook with the onions before adding water. After a few minutes, whisk in water, brown sugar, molasses, apple cider vinegar, spices, worcestershire and ketchup. Allow to simmer for about 15 minutes then slather it over your desired smoky staple. I had seitan (it tastes like chicken) and served them on whole wheat sandwich rolls. De-lish. 


Personal tastes for barbeque sauce vary as greatly as one's preference for perfumes or colognes, and I'm sure some BBQ aficionados would dab a little of their favorite sauce under their chin if they could. 

This is how I like mine. It's sweet, spicy and rich. If you like yours more acidic, add more vinegar. If you like yours spicy, add the full teaspoon (plus some) of cayenne. And if molasses isn't quite your speed, use a dark brown sugar instead.


 -----------------

Vegan Broccoli Slaw
Serves a crowd, with leftovers


[2] packages shredded broccoli slaw
[2] heads fresh broccoli
[3] heaping tbsp non-dairy mayonnaise 
[2] tbsp course ground mustard
[1] tbsp dijon mustard
[2] tbsp red wine vinegar
[2] tbsp agave nectar
[1] tsp salt
[1/2] tsp horseradish 

Rinse and cut broccoli florets into smaller bites, then blanch in boiling water until bright green. Remove with a slotted spoon and shock with cold water until completely cool. 

In a large serving dish, mix the broccoli with the broccoli slaw.

In a separate medium sized bowl, whisk vegan mayo, mustard, red wine vinegar, agave, salt and horseradish. Pour over the slaw and toss to combine. 

A crunchy, tangy barbeque staple... and you'd never know it was lactose free. 
-----------------

This final recipe for my Blueberry Banana Cake was the coup d'etat of the night. I made an entire cake, yet there wasn't a single crumb that lived to tell the tale. It's so moist, so banana-y, and so addicting.

My inspiration came from a non-vegan recipe that I found on Real Mom Kitchen. So, using a similar recipe from Oh She Glows, I made one of the best desserts I've ever had. And that's sayin' a lot. I'm slightly afraid, now, knowing that I won't be able to resist making it again. Continue at your own risk, but don't say I didn't warn you...


Blueberry Banana Cake with Lemon "Cream Cheese" Frosting
Makes about 15 servings (depending on how big you slice it)

For the cake:
[1 3/4] cups spelt flour
[1 1/2] tsp baking soda
[1/2] tsp baking powder
[1/2] tsp salt
[1/2] tsp cinnamon
[1] tbsp chia seeds
[4 1/2] very ripe bananas
[2] tbsp softened coconut butter
[3] tbsp olive oil
[1/2] cup agave nectar
[1] tsp vanilla extract
[1/2] lemon, juiced
[1] pint of fresh blueberries


For the Frosting:
[2] 8oz containers vegan cream cheese
[3] cups powdered sugar
[1] tsp vanilla
[2] tbsp lemon zest
[3] lemons, juiced
[2] tbsp melted coconut butter
[1] tbsp corn starch


To garnish:
[1-2] tbsp unsweetened coconut flakes
handful of blueberries and crushed raw almonds

Preheat oven to 325. Spray a baking dish (9x13) liberally with nonstick cooking spray. 

In a large mixing bowl, combine dry ingredients (spelt flour, baking soda, baking powder, salt, cinnamon and chia seeds). Make sure everything is well incorporated. 

In a small microwave-safe bowl, heat the coconut butter for about 15 seconds. Mix it up so that it's smooth and clump-less.  

In a medium mixing bowl, mash up 4 very ripe bananas with a metal fork. Add the coconut butter, olive oil, agave, lemon juice, and vanilla. Whisk like a fiend. Lastly, stir in the blueberries. 


Make a well (aka hole, or landing spot) in the center of the dry ingredients. Pour in the wet ingredients and fold them in with a rubber spatula. Once everything is incorporated, stop! As with most batters, don't overmix. Tough cookies have a time and a place... and it's not here. 

Pour into a greased baking dish and top with a blue extra blueberries. Pop it in the oven for 40 minutes. Once it's golden brown, and you've passed the toothpick test, remove from the oven. 


Cool next to an open window and watch all the boys come to the yard.  
-----------------
For the frosting, combine all ingredients in an electric mixer on low to medium speed. Pour over the cake (there will be extra for added drizzling pleasures) and top with blueberries, coconut and chopped almonds. You could definitely halve the recipe and still have enough to cover the cake, but who doesn't love a little extra sugar? FYI, the frosting becomes so much thicker after spending a couple hours in the fridge. 

Slice the cake as big as you like and serve alongside a couple big juicy strawberries or a healthy scoop of ice cream. 


Now, ascend to heaven. 


Happy June, everyone! 

Sunday, May 1, 2011

Quinoa Cakes, Grilled Heirloom Tomato and Sprout Salad


Sometimes, a single picture can write a thousand words.

And other times, it's the week before finals and I don't have time to write more than three sentences. Oof. 

That said, enjoy these awesome photos (and the temporary recess from academic responsibility). If you're like me, you have enough reading to do as it is... and wouldn't it be nice if they were picture books. Hey, I can dream.


The recipe for the cakes was inspired by the Carrot-Quinoa cakes found on A Fresh Squeeze. All photography on this post was done by Amanda Johnson. 


Quinoa Cakes, Grilled Heirloom Tomato and Sprout Salad
Serves 4-6

[5] large carrots, peeled and chopped into 3 inch long sticks
[2] tsp salt
[1] cup dry quinoa
[1/3] cup chopped onion
[1] garlic clove
[1] tsp olive oil
[1/4] tsp cayenne pepper
[1/2] tsp cumin
[1/2] tsp smoked paprika (Thanks, Dad!)
[1/4] cup whole wheat Japanese panko
cracked pepper

[2] large heirloom tomatoes, cut into 1/2 inch slices
[2] tsp olive oil
[3] tsp balsamic vinegar
[1/2] tsp dijon
salt
pepper

[1] cup fresh sprouts (I used clover sprouts)
[2] tbsp chopped green onions

For the cakes:
Start by preheating your oven to 375 ° F. 

Bring a medium pot of water to a boil. Drop in carrot sticks plus 1 teaspoon of salt, return to a boil, and cook until the carrots are soft, but not mushy. Reserve 2 cups of the hot carrot water, then drain the rest. Add the carrots to a food processor.

Return the reserved water to the pot and add the quinoa. It should take about 10-15 minutes to cook, or until all of the liquid has absorbed.

Meanwhile, heat a small saucepan to medium. Once hot, add 1 teaspoon of olive oil, chopped onion and garlic. Sauté for about five minutes, or until both the onions and garlic are translucent and aromatic. Add it to the food processor with the carrots, along with 1 teaspoon of salt, cayenne pepper, cumin, and smoked paprika. Purée until the mixture starts to resemble baby food (an unappetizing way to describe it, but trust me).

Transfer the quinoa and carrot purée to a medium mixing bowl, then add the whole wheat panko and cracked black pepper. Use a metal fork to combine until everything is well incorporated. Spray a large muffin tin with non-stick cooking spray and distribute the mixture evenly. Bake for 15 minutes until the edges are golden brown. Because the cakes are delicate, I flipped the muffin tin over onto a sheet pan of equal size (rather than removing them directly from the mold).


For the toppings:

Heat a grill pan to high.

While it's preheating, whisk together the balsamic, olive oil, dijon, salt and pepper. This will be the marinade for the tomatoes as well as the dressing for the sprouts. 

Once the grill is hot, spray with nonstick cooking spray, brush the tomatoes with the dressing, and place on the grill. (It's easiest to brush just one side, putting that side down first, then coat the top side). Cook only for 2 minutes, flip and cook for another couple minutes, then immediately remove from grill.


In a small bowl, dress the sprouts and green onions with the remaining marinade.

Top each quinoa cake with a slice of grilled tomato and a small portion of the sprout salad. Drizzle the top with a healthy tablespoon of olive oil and balsamic vinegar, and serve with your favorite crisp white wine.


Oo la la

Wednesday, April 20, 2011

Hump Day Fun with a Burger: Paradise Found

Hump day.

What a day, what a day.

As we slide out of the agony of a cruel Monday/Tuesday suckerpunch combo, we're given a false sense of hope that the weekend is actually within reach.

Midway through our seven day stretch, like an uncertain limbo, Wednesdays present the difficult question: to drink, or not to drink?

Luckily, this particular Wednesday is...special.

So pick your poison-- whether you're singing "Bottom's Up" or "Burn One Down," everyone deserves a hearty treat to get them over the midweek hurdle.

In honor of a day when your hunger pangs cry just a little louder, here's a recipe that'll make you drool. And since a day like today only comes around once a year, don't let anyone make you feel bad about drooling.


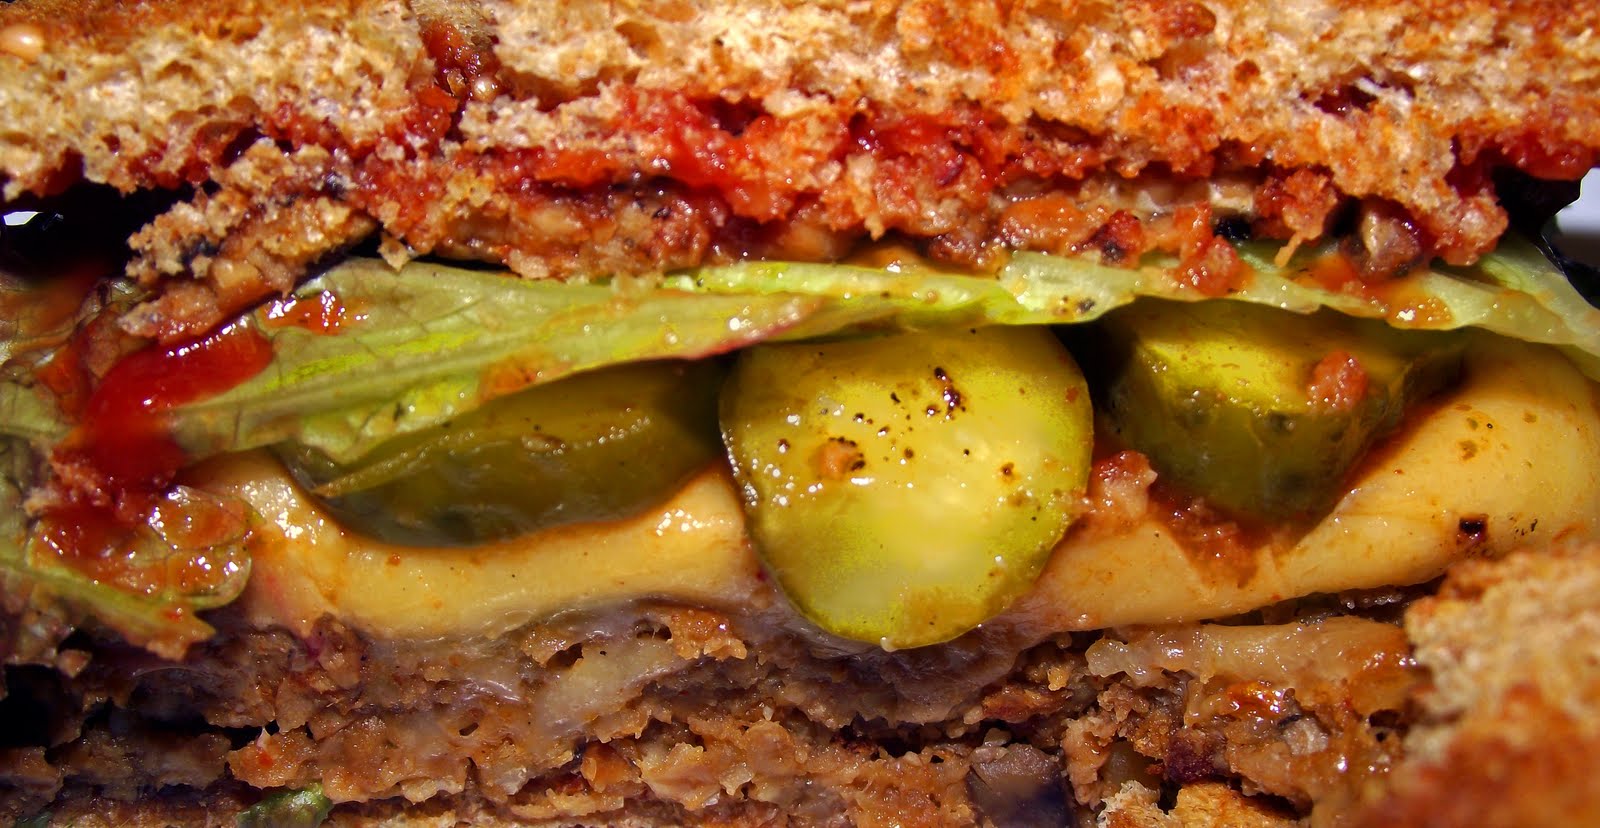
Healthy Cheeseburger in Paradise
Serves 1

[2] slices organic whole grain bread
[2] slices Tempeh Smoked "Bacon"
[1] vegan burger (my favorites are Boca Original Vegan Burger and Amy's Quarter Pound Veggie Burger)
[2] oz vegan cheese (I used Vegan Gourmet Cheddar Style)
[1] tbsp sliced pickles
[1] large leaf lettuce
[1] slice tomato
[1] tbsp ketchup
[1] tbsp Veganaise mayo (optional)

Toast the bread in a toaster oven. Tricky, I know. It gets more complicated so pay attention...

Defrost your burger in the microwave for 1-2 minutes.

Heat a skillet to medium/high heat. Spray with a nonstick cooking spray and add the Tempeh Bacon. Cook until browned on both sides. Set aside.

Add burger to the pan and cook evenly on both sides until browned. Top with vegan cheese, and cook for about 3 more minutes, covered, until the cheese melts and the burger is warmed through.

Assemble the burger to your liking, adding or taking away ingredients so that your final creation turns into a little bite of paradise.

Now plop down on your sofa and picture your uninhibited weekend self laughing the day away. It will come soon enough, I promise.


Chomp.


And for all of you who have likened vegan food to the diet of a certain Easter icon, I hope you've learned something.

Because yes, from time to time, vegans crave cheeseburgers.


The End.


And Happy Holidaze to all.

Wednesday, April 6, 2011

Detox, Reeboks

I don't care if you're Mother Theresa, we all have those weekends when self-control virtually goes AWOL.

Famous last words: "I was being so good... until I went to Cookout on Saturday night... followed by Taco Bell."

Whether you're on a health-food kick or trying to log more hours at the gym, an indulgent weekend can throw a monkey wrench in whatever plan we thought we thought we made, erasing all progress on that Banquet Bikini Countdown.

Unfortunately for our asses, after barhopping Wednesday and Thursday, latenight dancing to Rebecca Black on Friday, and daydrinking on Saturday, all you want from Sunday is a big, fat brunch. If, of course, you can manage to be fully functioning before 2 p.m.

If not, there's always delivery.

When Sunday does roll around, it's like God's gift to the college student. If the week went straight from Saturday to Monday... I actually can't even finish that thought. And though I know you really wanted to make it to service this time, just so you could thank Him for giving us a solid 24 hours to become real again, the weekend toll proved (once again) to be too much.

As Monday inevitably arrives, like it somehow always does, our bodies have abandoned ship. And let's face it, so has all motivation to hit the gym.

Sound a little too familiar? Lucky for you, no one can see you nodding.

So, for anyone who has ever experienced the three-day dietary train wreck known as "the weekend," this post is for you. I can't help you finish your finance homework, but I can help you get back on track.

This recipe is for one of nature's superfoods: kale. It's literally one of the most nutrient dense vegetables you can find, and will definitely help recondition your body. This leafy green packs in all the fiber, vitamin A, calcium, antioxidants, potassium and beta-carotene that you didn't get from your Bud Light. If you've never cooked with it before, go to Harris Teeter now and buy some. It's easier to make than pasta.


Braised Kale and Couscous with Mango Relish
Serves 2

For the Kale:
[2] cups chopped kale, stems removed (about 4 leaves)
[1/4] vegetable stock;  use water if you don't have any on hand
[1/4] white wine*
[1] garlic clove, minced
[2] tbsp lemon juice

[2/3] cup dry couscous (for bonus points, use whole grain)

For the Mango Chutney:
[1] mango, chopped into half inch pieces
[1/2] cup cherry tomatoes, quartered
[1/4] cup diced red onion
[2] tbsp chopped parsley (or cilantro)
[2] tbsp chopped scallion
[1] lime, juiced
[1/2] tsp cayenne pepper
[1] tbsp roughly chopped almonds

Start by peeling and chopping the mango. It can be a little tricky because mangos have an awkwardly large pit, but don't worry too much about finesse. Place in a medium mixing bowl along with quartered tomatoes, red onion, chopped herbs, lime juice and cayenne pepper. Incorporate all the ingredients well and let them mingle in the refrigerator while you make the kale and couscous.

Rinse kale and remove the bottom part of the stem. Some people remove the whole stem, but I cut off just the tough end. Chop into 1 inch strips (cutting across the stem, widthwise).

Pour veggie stock and wine into a medium sauté pan with minced garlic and heat on medium/high until simmering. In the meantime, bring another pot of water to boil for the couscous (exact amount according to package directions). Once boiling, pour in the couscous. Many packages take just 5 minutes.

Place the kale in the hot pan and cook, covered, for 5 minutes or until the kale is bright green and tender. Drain, then squeeze on the fresh lemon juice to save color and add freshness.

Fluff the couscous with a fork once done and pile it on a plate. Cover it with the fresh mango relish and garnish with the crushed almonds. Serve alongside your kale, and you'll have a hearty, nutritious meal in no time. It may even inspire you to lace up your sneakers and hit the gym.


Now crack open a fresh beer and pat yourself on the back for bein' so freaking healthy.


*Optional: you could replace the wine with an equal amount of stock or water, but any excuse to use wine is a good one.

Friday, April 1, 2011

Taste the Rainbow

Happy April everyone! I hope you're excited-- spring is right around the corner!! 

April fools. 

I'm in Boston today, and motha nature was a biatch. An inch of snow?! April fools! But, really... 

So, to satisfy your springtime woes, here's the rainbow you won't see when you look outside your window. 

This salad is just that... a salad.

What makes it interesting? Well, it's certainly not foodporntastic. But just look at the pictures (and oh, yeah, the title of the post). This salad is pretty.


You've obviously heard the saying that we eat with our eyes first. While this won't be true for those late night nosh sessions when we practically don't even see our food, presentation really is half of our dining experience. And if we're going to eat a healthy meal, it might as well come dressed for the party. Am I right?

It's true what the experts say-- the more colorful your ingredients, the better it is for you (just don't ask me why). To make it a little more nutritious, I sprinkled wheat germ on top. Despite it's silly name, don't be scared of wheat germ. It has a toasty flavor and is great in yogurt, on salads (clearly) or on top of fresh fruit. It adds great texture plus a handful of vitamins like protein, iron and fiber.

I googled that.

For this salad, I just used what I already had in my fridge. Experiment with your own favorite ingredients! Putting it all together is the most fun part. And when you're done, if it ends up looking pretty, well isn't that just the cherry on top of the... salad.

Rainbow Salad
[1] cup mixed leafy greens
[1/4] cup sliced grape tomatoes
[2-3] tri-color mini bell peppers
[1/4] cup red onion, very thinly sliced
[2] celery stalks, chopped
[1] tbsp wheat germ

For the dressing:
[1] tbsp balsamic vinegar
[1/2] tbsp lemon juice
[1] tsp dijon mustard
[1] tsp green onion, sliced
[1/2] tsp agave nectar
[1] tsp olive oil
dash of soy sauce
salt
pepper

Whisk together all the ingredients for the dressing in a small bowl. Then assemble your salad to your liking. That's it, folks.

A satisfying lunch, both visually and tastefully.

**Side note: Today officially starts the FOURTH month of my vegan living (and loving)! Remember when my goal was to try it for just one month? I'm feeling amazing and really see no reason not to continue! So onward I shall go...


I eat salad all the time... April fools!

Tuesday, March 29, 2011

Winning: Pasta with Broccoli and Yum


Disclaimer: I hate jumping on the band wagon. Especially when a particular topic has been beaten to death (via status updates/album titles/photo captions/tweets YES I HAVE TWITTER NOW @taryneleanor... follow me).  


But Charlie Sheen is special case... 


For whatever reason, when I was writing this recipe, his fun little catchphrase came to mind. And although I could try to explain the addicting garlicky cheesiness of this pasta, Chuck just has such a way with words. So I'll pay tribute here, to a man whom I personally hate, but whose words have touched us all.  Here's what the great American poet of our generation has to say:

"It's perfect. It's awesome. Every day is just filled with just wins. All we do is put wins in the record books. We win so radically in our underwear before our first cup of coffee, it's scary. People say it's lonely at the top, but I sure like the view."

Thanks, Chuck. Couldn't have said it better myself. 


This pasta is just that-- one for the record books. A bowl of wins. Make this pasta, and you'll get it. 


Flavorful + filling = winning


Shout out to all you cheese-loving normalvores out there-- fear not. You can easily swap out the vegan cheese for something more your style, maybe mozzarella or parmesan. Or if you're anything like my roomies... both! Love them. And I promise I don't judge.


So without further a-do (?), here's how I made it:


Garlic Lemon Pasta with Broccoli & Sun-dried Tomato
[2] oz pasta shells
[1/2] cup broccoli
[1/3] cup vegan cheese (daiya really is the best)
[1] garlic clove
[1/2] lemon juice
[1] tbsp sun dried tomato, minced
[2] tsp olive oil
[1] tbsp chopped basil or parsley
salt
cracked pepper


Start by bringing a pot of water to a boil. Once it's boiling, add a considerable pinch of salt and cook pasta until al dente.


Meanwhile, steam the broccoli. I find that it's easiest to do this in a microwave. Just fill a microwavable bowl with about 1/4 inch water, add broccoli, and cover. Microwave for about 2 minutes, or until broccoli is bright green and tender.


Cook garlic in a small sautee pan with 1 tsp of olive oil until it starts to turn color. Add sun dried tomato and continue cooking for about 1 minute.


Once pasta is cooked, drain and return to pan. Add broccoli, garlic and sun dried tomato, cheese, lemon juice, salt, pepper, and remaining olive oil. Combine and transfer to a dish. Top with fresh herbs.


Take a bite and try not to pass out.
Yum-Oh

Tuesday, February 8, 2011

Rigatoni Primavera

Basil, salt, carrots, spice, carbs, and cheese. These are a few of my favorite things. I kid you not, I could eat this dish every day. Here's how it breaks down:

The main ingredient of this meal is a given: Carbs. I may be a girl, but really... Who doesn't love pasta? 

The star of this meal: a certain green herb that I can't seem to get enough of. And no, it's not what you're thinking. I'm talking about basil. I could put it on top of anything... and I do! I love it. Love. (I even tried basil gelato in Rome, which I'd probably only trust the Italians to do right. It was amazing). 


Go ahead and add ice cream to my list of vices. 


Then there's carrots. I'm not sure if cooked carrots were a childhood favorite of mine, but for some reason, I could have cooked carrots every night for the rest of my life. They're just so good! I realize it's a little weird that a 20-year-old college student is obsessed with carrots, but I can bet that my kindergarten homies would all agree on the simple fact that carrots are just yummy... 

...with a dash of salt. I hate to admit it, but I may be a salt addict. Along with basil, salt goes on just about anything. 

And cheese. Praise Allah that vegan options exist and taste good! You'll probably figure out soon that I rarely make a meal without it. 

Finally, I like things spicy. Not too hot, but just enough to wake up the palette. Whether it's hot sauce, cayenne pepper, or red pepper flakes, a little zip is almost always necessary. 

Put it all together, and you really have the perfect meal. This Rigatoni Primavera is loaded with veggies (and vitamins--woo!), so it's healthy. I like the addition of carrots because it's a little twist compared to traditional pasta dishes, and the basil gives it an addicting freshness. Needless to say, rigatoni and cheese make it a little splurge-worthy, so you could definitely make it with whole wheat pasta or brown rice pasta. But come on, the white stuff is just too good! After all, in life and in diets, perfection can be wearing. 

Rigatoni Primavera
[1/2] lb rigatoni
[3] cups fresh spinach leaves
[1] cup diced carrots, peeled and in quarter-inch pieces
[1] can diced tomatoes 
[1/3] cup yellow onion, chopped
[1] tsp minced garlic 
[1/2] tsp red pepper flakes
[2] tbsp fresh basil; julienned
[1] tbsp olive oil
vegan parmesan
sea salt
cracked black pepper

Cook pasta to package instructions until al dente. Sauté onions in olive oil on medium low heat until tender, then add garlic, salt and pepper. Cook for about 5 minutes then add tomatoes, spinach, carrots, red pepper, and a little more salt. Simmer for 10 minutes, then add pasta and stir to combine. Top with parmesan and lots of fresh basil. Then, understand my obsession. 

The perfect bite. Libby thought so, too.

Monday, December 27, 2010

Pesto Pizza with Balsamic Caramelized Onions


Basil Pesto Pizza with Balsamic Caramelized Onions
Trader Joe’s premade Garlic & Herb pizza dough
[1] cup homemade pesto
[2] balls fresh mozzarella, sliced to 1/8 inch
[1/2] cup fresh grated Pecorino Romano
[3] small yellow onions, thinly sliced
[1/3] cup balsamic vinegar
whole wheat flour
Olive oil
Salt
fresh cracked black pepper


Preheat oven to 450 or to pizza dough package directions. 


Thinly slice onions and saute in olive oil on low heat for about 15 minutes. Add the balsamic and continue to saute for another 15-20 minutes until the onions are caramelized. 


Roll out the pizza dough using wheat flour to prevent sticking. Shape it depending on the size of the pan you use. Before transferring the dough to the pan, grease the pan lightly with olive oil. (I think you get the best results when you pre-bake the dough for about 10 minutes.)


Top the dough with the pesto, sliced mozzarella, caramelized onions, and pecorino cheese. Add a couple cracks of black pepper and bake until the cheese is melted and the crust is golden brown (about 15 minutes). 


When the pizza is done, top with fresh herbs and a little more pecorino. 


Confession: I also had this the next day for breakfast. 
(And don't pretend like leftover pizza for breakfast isn't like, the best thing ever.)

The great debate remains, however... do you eat the leftovers hot or cold?


Monday, December 20, 2010

Holiday Haddock and Pesto Potatoes


Tonight, I was really inspired to use up some of the fresh herbs that had been patiently waiting in our refrigerator. More specifically, I wanted to put a dent in our ridiculous quantity of basil (my favorite herb of all time) before all the leaves started to wilt. If I learned something from my French host mother, it was to use up fresh ingredients as. soon. as. possible. So, what do you do when you have a humongous box of basil that's practically on a countdown to expiration? Make pesto, of course!

With pesto as my inspiration, I created this recipe for potatoes with basil sauce and pan-seared haddock with a roasted tomato and pepper sauce. The red sauce is so flavorful and is absolutely delicious paired with the flaky haddock. The basil sauce adds the perfect compliment and is versatile enough to use in other recipes. Plus I love the red and green colors, making it perfect for a Christmas-time meal. 
Basil Sauce
[2] cups fresh basil
[1] lemon, (juice and zest of half)
[2] tbsp toasted pine nuts, plus [1] tbsp for garnish
[2] garlic cloves, chopped
olive oil
salt
pepper

Start by toasting the pine nuts on low heat-- keep an eye on them because they burn so quickly! When you can smell them, they're done. Next, purée the garlic, lemon zest and lemon juice in a blender. Then add the pine nuts, basil, salt and pepper. Start blending and stream in the olive oil until the sauce is completely smooth. I served the sauce chilled on top of the warm potatoes, and sprinkled a couple toasted pine nuts and fresh chopped basil as a garnish.

Boil the potatoes in heavily salted water for about 15 minutes or until fork tender.

I think the fillets look like mittens.
For the haddock, marinate the fillets simply in olive, sea salt, and pepper for about 30 minutes...

When the sauces are finished, just pan fry the fish in olive oil for about 3-4 minutes per side or until the fish is firm to the touch.

Any sturdy white fish will do in this recipe. The sauce is light enough for delicately flavored fish like haddock, but also can stand up to strongly flavored fish. Use whatever looks the freshest. If it looks like it's been dead for a week, chances are it tastes like it, too.


For the red sauce, I knew I wanted to maximize the flavor of the tomatoes (since they're out of season), so I roasted them in the oven and added tons of flavor with roasted red peppers and red chiles. It's not spicy, but has an incredible depth of flavor. You can monitor the spice level by adding more or less red pepper flakes. I adore this sauce and can't wait to make it again. It's gets better the longer it simmers, and even tasted amazing after 1 or 2 days in the fridge. 

Roasted Tomato Pepper Sauce
[6-7] vine-ripened tomatoes
[3] dried New Mexican red chiles, rehydrated (water reserved)
[2] roasted red peppers (you can totally make your own, but I just used jarred)
[1] tsp red pepper flakes
[1] small yellow onion
[1] garlic clove
[2] tbsp worcestershire
[1/4] cups balsamic vinegar
olive oil
salt
pepper

First, preheat the oven to 400 degrees. Cut the tomatoes in half and season with salt, pepper, and a healthy amount of olive oil. Roast for one hour until the tomatoes are caramelized and rich in flavor.

Meanwhile, rehydrate the chiles in hot water for 20 minutes. After the chiles are softened, take them out of the liquid, remove any seeds, and chop finely. Purée in the blender with about [1/3] cup of the reserved liquid until completely smooth.

Sauté the onion until tender, then add the garlic and about half of the red pepper flakes. Transfer to the food processor, add the puréed chiles, the rest of the red pepper flakes, roasted tomatoes, roasted red peppers, worcestershire, balsamic, salt and pepper. Pulse until the mixture is combined but still chunky. Taste and season with salt and pepper. I simmered the sauce while I cooked the haddock for about 10-15 minutes. 


Most people know that I looooooove on the salt, so I tend not to suggest quantities here. Season until you think it tastes good, adding more balsamic or maybe more red pepper flakes to make it spicier. I never follow recipes, so I won't feel bad if you don't either! 


The resulting flavor is so rich and works perfectly with the brightness of the basil sauce. The two huge haddock fillets made about 5 portions, but the sauces leave lots of leftovers. The basil sauce would work great as a marinade and the red sauce would be amazing on vegetarian tacos!